Published on September 22, 2024 - Updated on March 22, 2025
8 min read
A dive into creating an interpreter in Rust for the Monkey programming language while creating a playground based on the WASM build.
Contents
Writing an interpreter in Go Rust
I was inspired by some Twitch streamers to dive into the implementation of a programming language. It seems to be interesting to understand the inner workings of a programming language and how to go from a sequence of letters to a functioning program.
The Writing An Interpreter In Go book was one that I had seen online and strongly recommended by some of the tech influencers online I follow, so I decided to give it a try. And oh, actually, I wrote it in Rust and not in Go.
Why use Rust?
Throughout the book, all the examples and some concepts are related to the programming language you use to implement the interpreter, which is Go in the book. A lot of the examples were well translated to Rust and often times simpler. As for the concepts, many were unnecessary because of the following.
1. Rust’s core features
Due to the nature of pattern matching, traits, and sum types, some of the concepts were in Rust! Here are a few examples that I stumbled upon within the book:
- hashing in Rust is pretty simple if you use derive macros - no need to create a custom hashing function (although for performance improvements, creating a custom one could help since any specific implementation is better than a generalized implementation)
- no need to have interfaces to implement for a token/expression/statement and no need for string constants representing a type. Rust’s enum types are powerful to contain related data and to express exhaustiveness
2. Not garbage collected
Unlike Go, Rust doesn’t have a garbage collector and yet doesn’t leave you in charge of managing the memory. Rust depends on RAII (resource acquisition is initialization) to manage the memory of the variables used within a Rust program. In turn, it complicates Rust with its borrow checker and ownership system but leaves you worry-free of memory mismanagement errors while not having a garbage collector.
This should result in a simpler binary output (one without a garbage collector) and allow the underlying compiler to further optimize the binary due to the strict lifetimes of the variables and explicit Rust types.
3. WASM support
I knew I wanted to create an online playground to test out the features added to the interpreter. Rust can compile to WASM which makes this a great language to use, and I had compiled to WASM in the past with ease.
Thanks to wasm-pack and wasm-bindgen, I created an npm package @benjeau/monkey-interpreter (which is less than 200KB) which I can then use within my frontend React codebase! Not saying this isn’t possible with Go, it’s just easy to do it in Rust.
4. Test-driven development
The std library of Rust has a great base for creating test cases, from verifying equality of structs (based on the PartialEq trait) to the verbosity of the test failures with optional message arguments. Adding cargo-watch on top of that makes it as easy as possible to view in real-time as you make your changes to know if they are breaking other features you’ve added previously within the interpreter. Since the book did not make you depend on external libraries/crates, the compilation and the feedback loop from when you break a feature to viewing it within the output of your tests is within a couple of milliseconds.
The Monkey language
What’s “Monkey” code? It’s a language created for the purpose of learning about the inner workings of an interpreter made by the creator of the book - https://monkeylang.org/. It looks a bit like JavaScript, Python, and Rust.
Code examples
Here’s what the language supports (as pulled from their website):
// Integers & arithmetic expressions
let version = 1 + 50 / 2 - 8 * 3;

// ... and strings
let name = "The Monkey programming language";

// ... booleans
let isMonkeyFastNow = true;

// ... arrays & hash maps
let people = [
  { name: "Anna", age: 24 },
  { name: "Bob", age: 99 },
];
You can create your own functions or use the built-in ones.
// User-defined functions
let getName = fn(person) { person["name"]; };
getName(people[0]); // => "Anna"
getName(people[1]); // => "Bob"

// ... built-in functions
puts(len(people));  // prints: 2
Everything is scoped, and returning data from a function can be done multiple ways.
// Conditionals, implicit, explicit returns, and recursive functions
let fibonacci = fn(x) {
  if (x == 0) {
    0
  } else {
    if (x == 1) {
      return 1;
    } else {
      fibonacci(x - 1) + fibonacci(x - 2);
    }
  }
};

// `newAdder` returns a closure that makes use of the free variables `a` and `b`:
let newAdder = fn(a, b) {
    fn(c) { a + b + c };
};
// This constructs a new `adder` function:
let adder = newAdder(1, 2);

adder(8); // => 11
Development
When I started reading the book, I created a new Rust project and started implementing the interpreter. Everything started with tests, which led the implementation of the code.
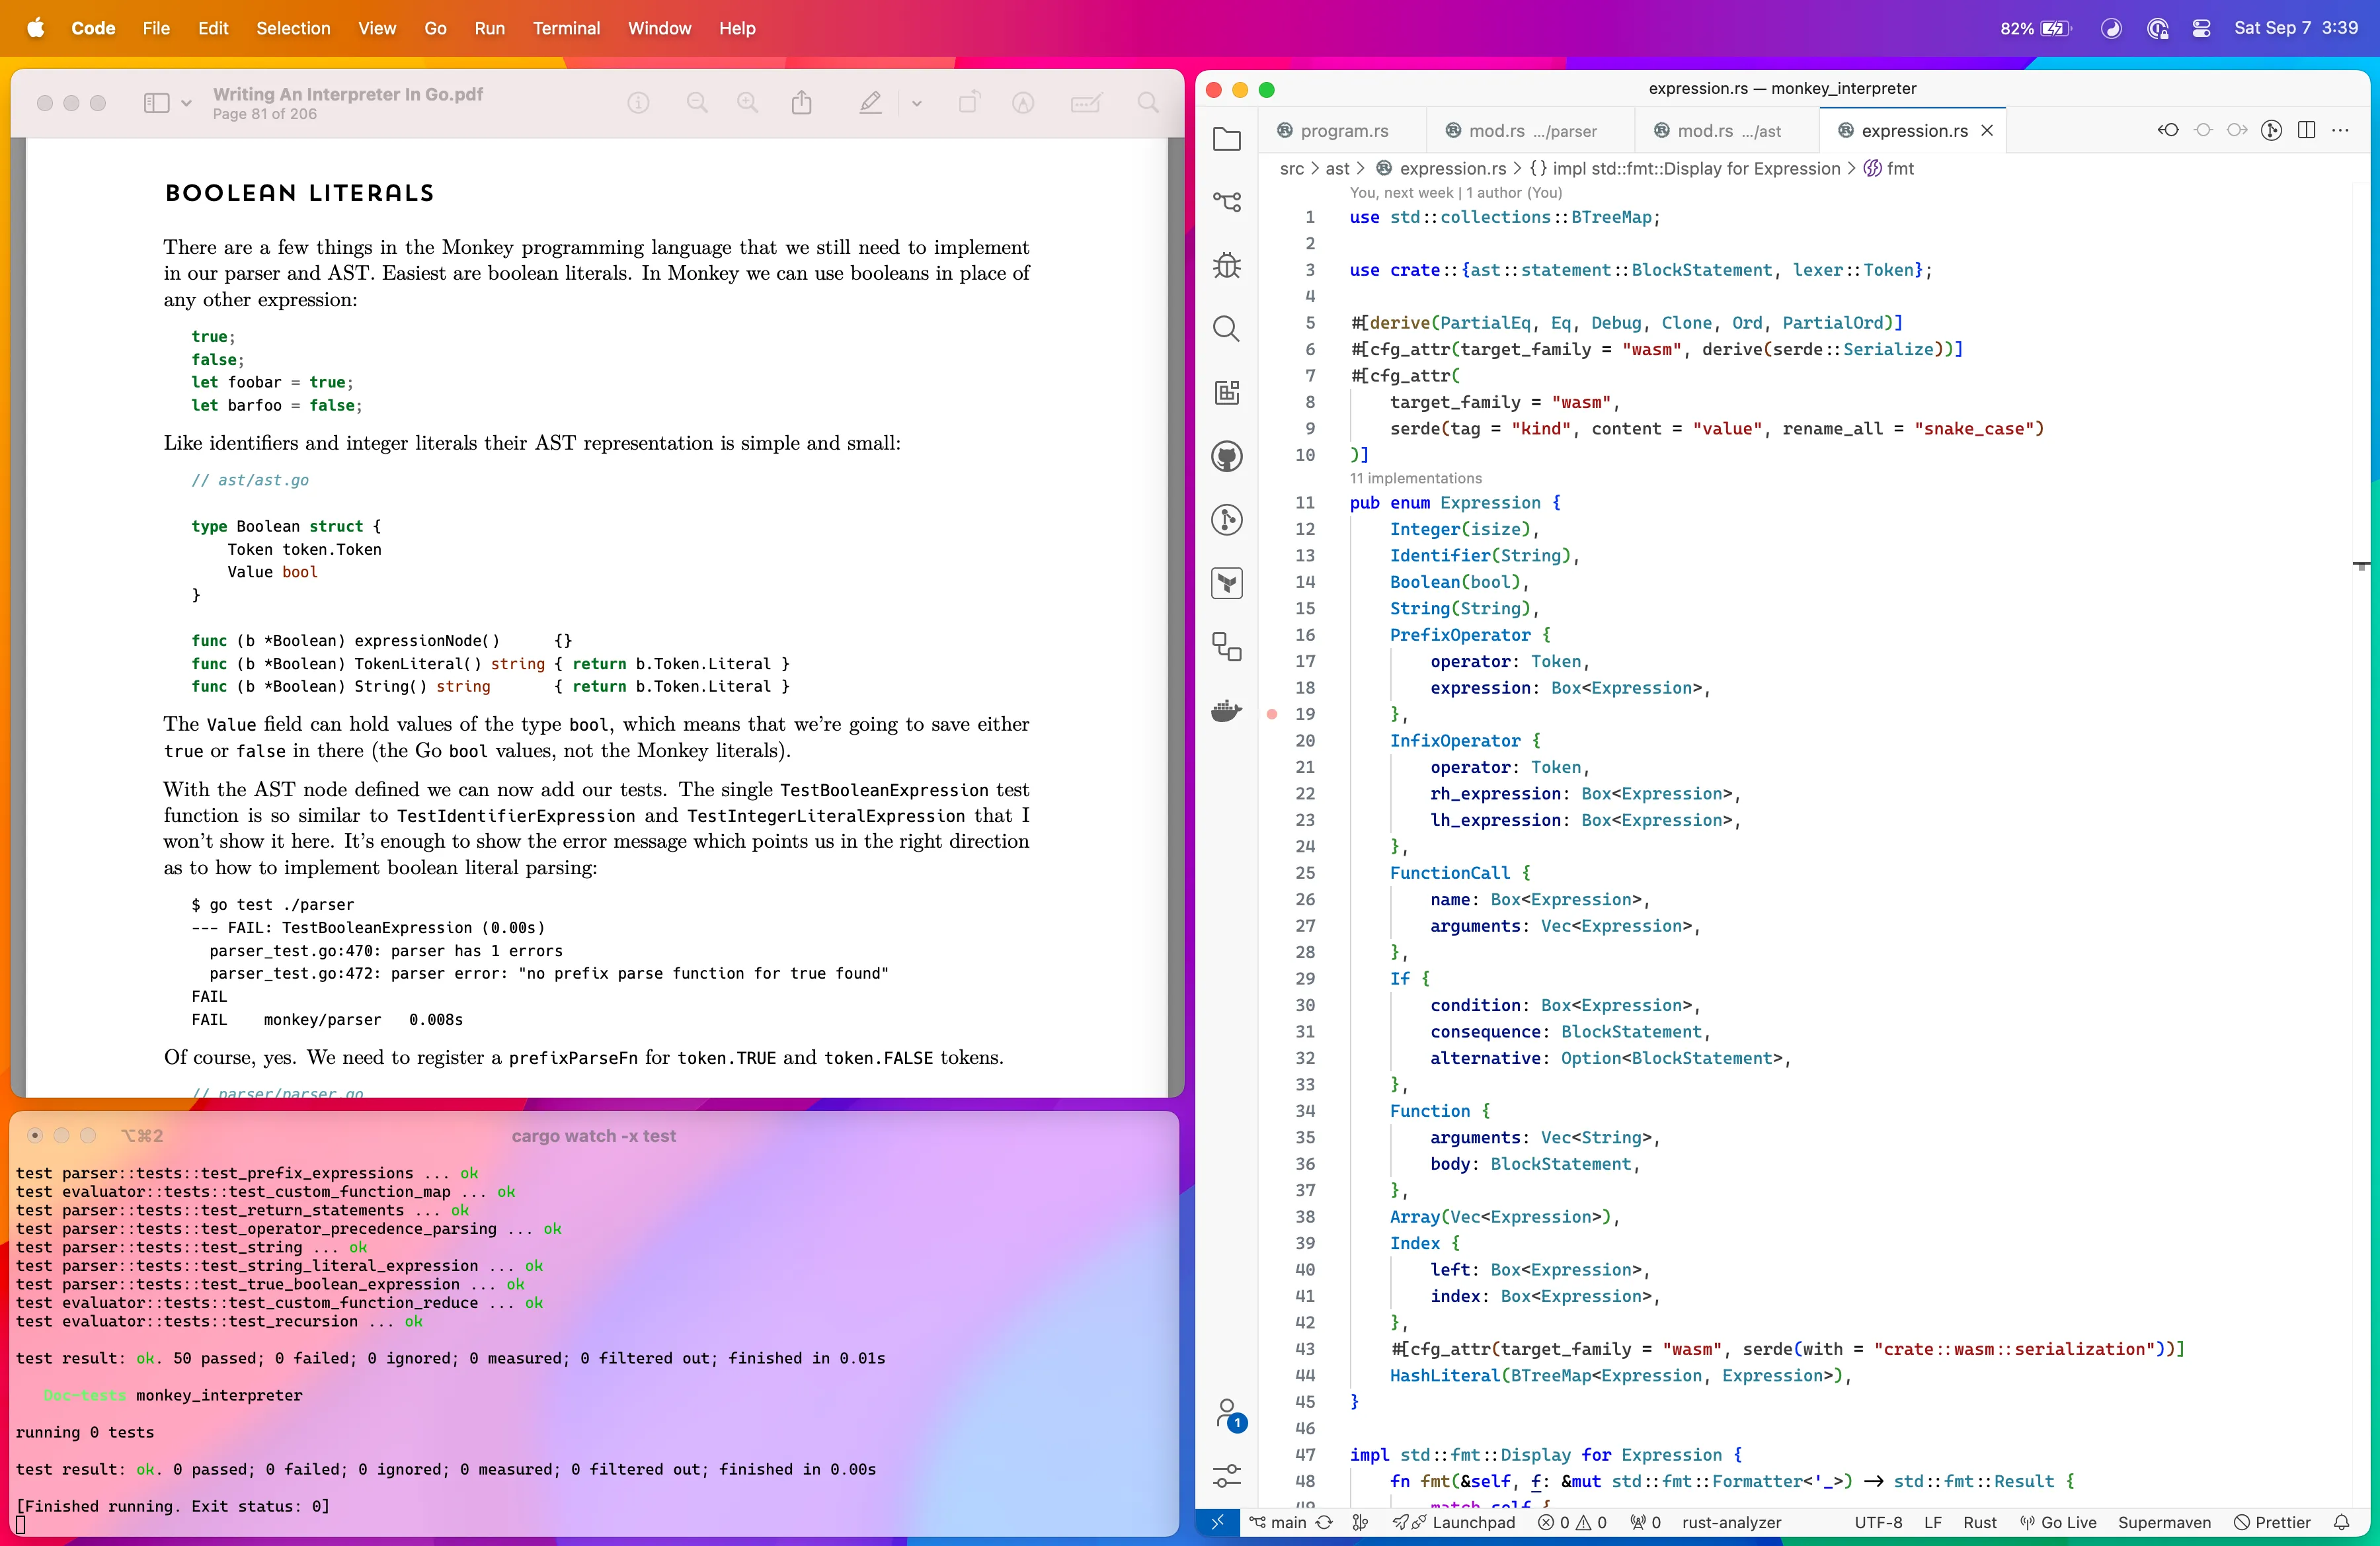
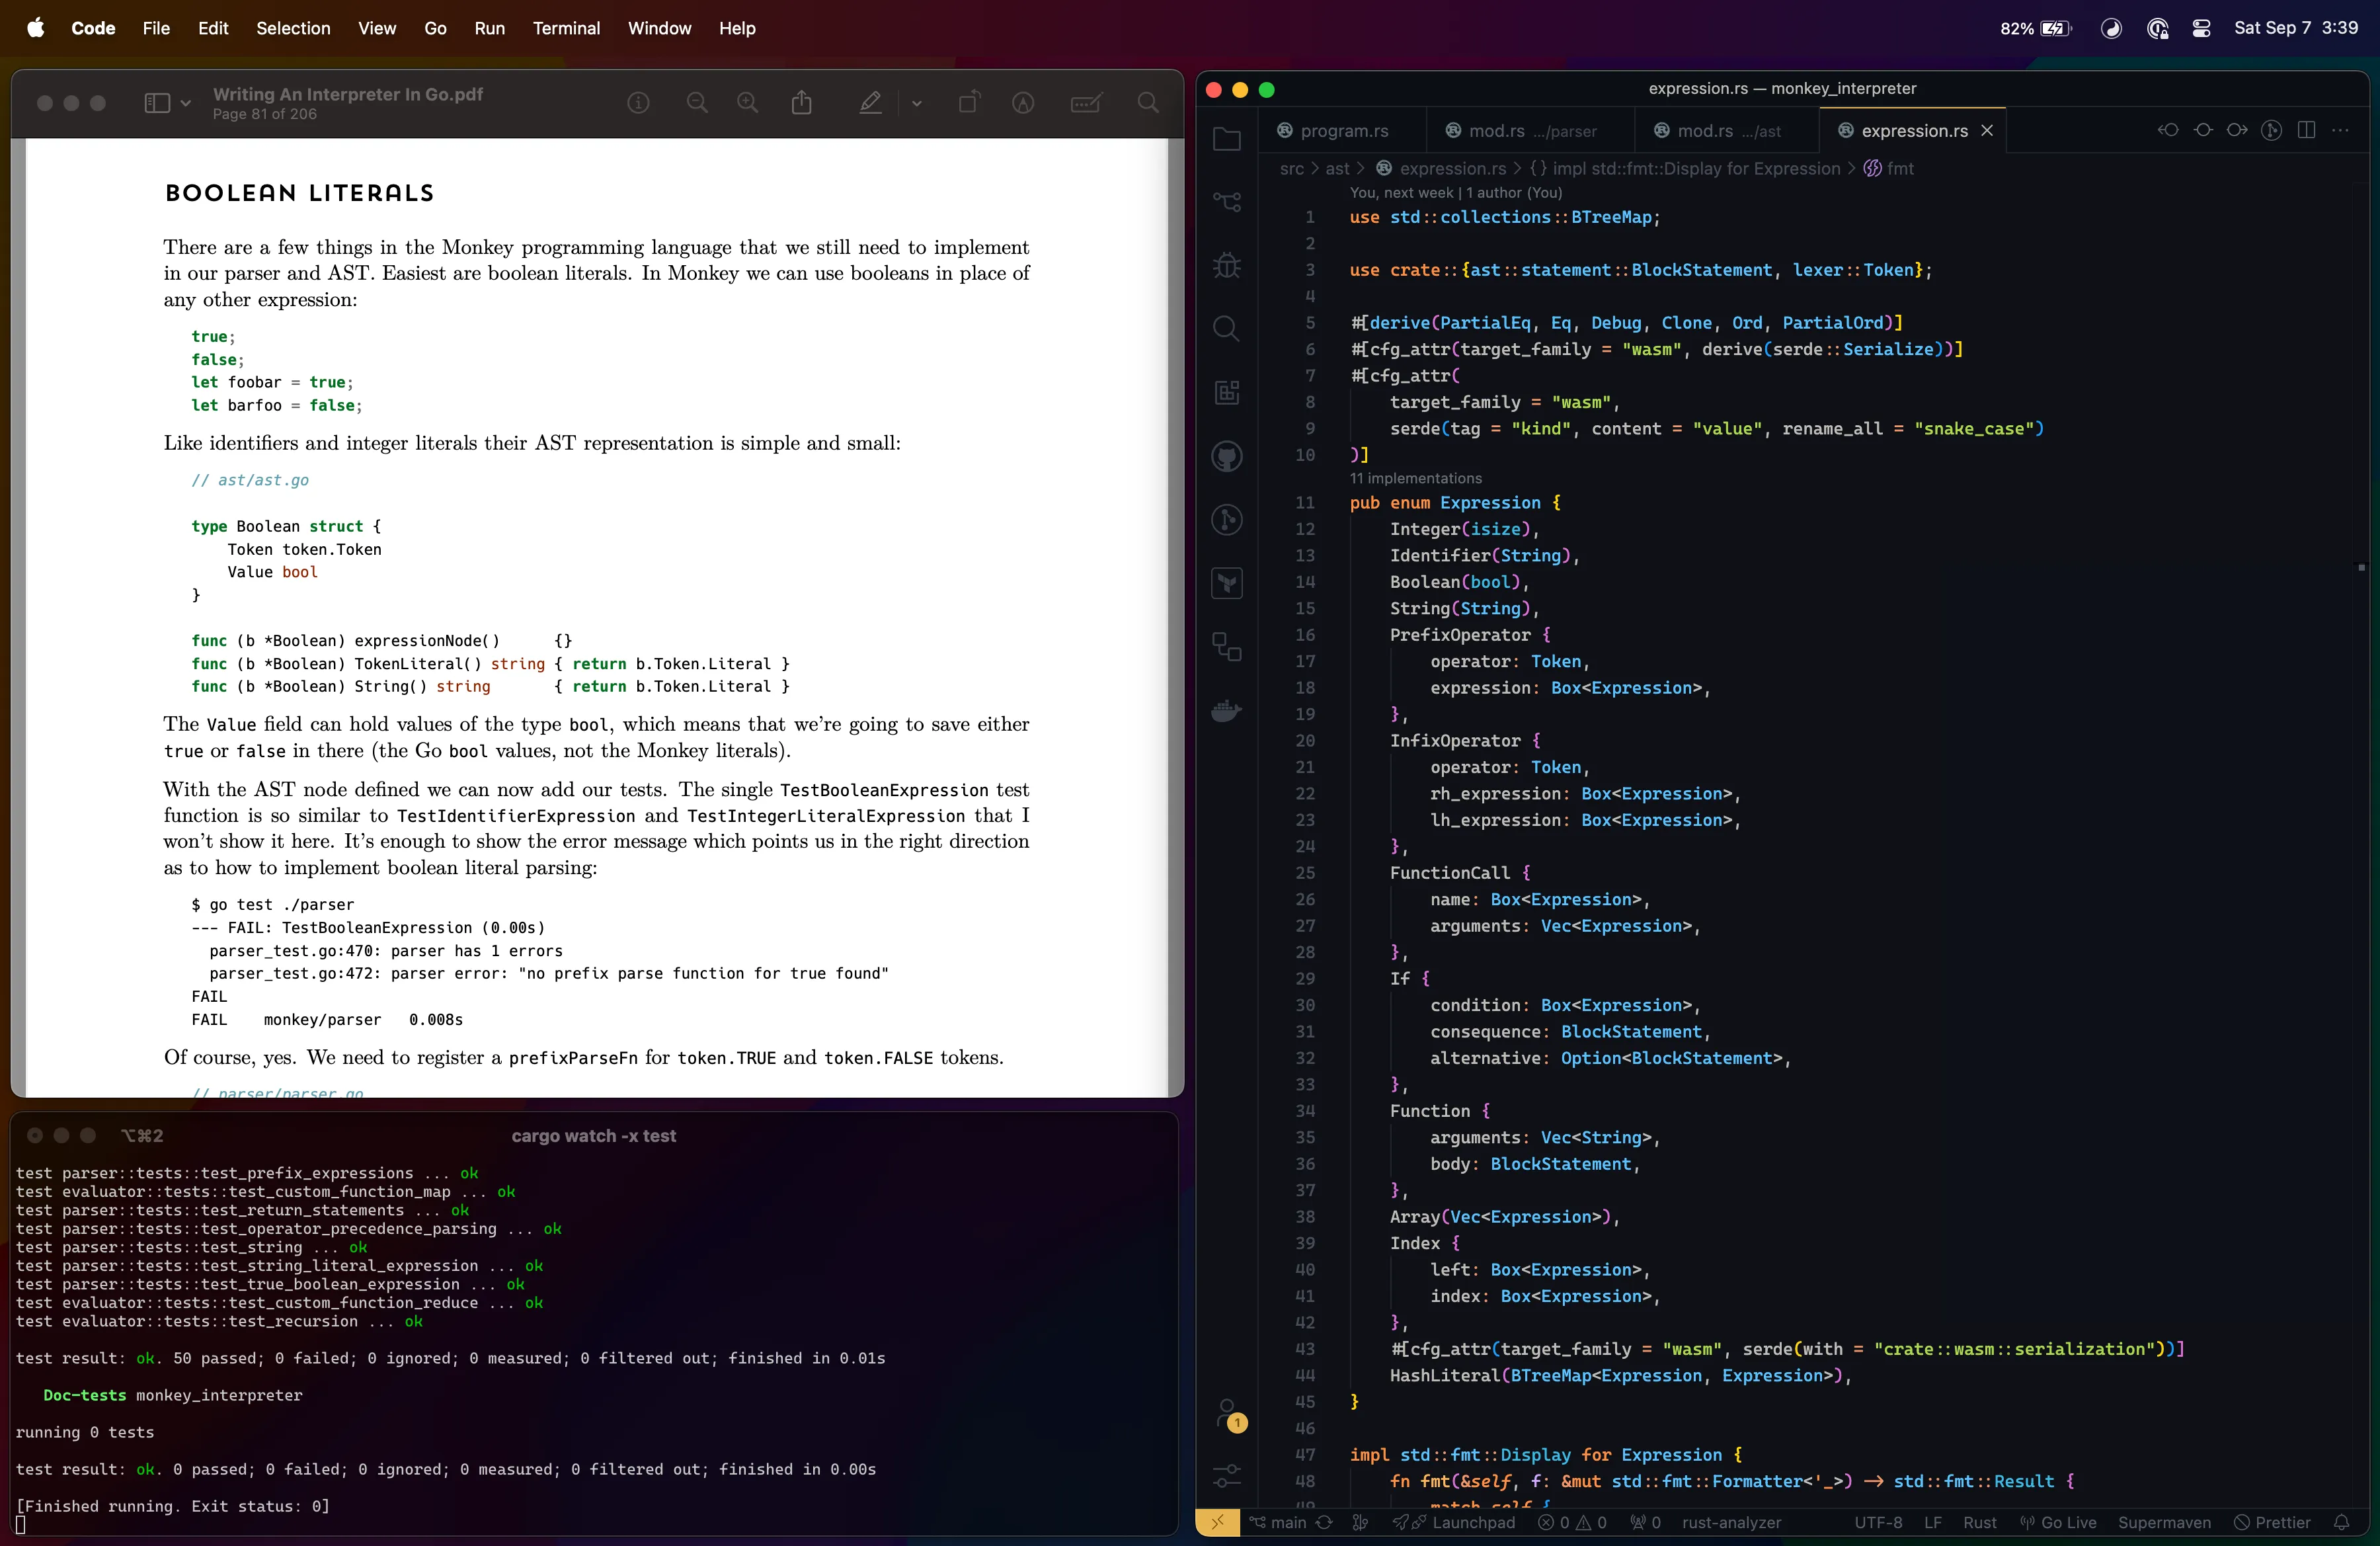
Computer setup
I’m one that likes to code in various spaces other than my desk. I had the following setup where I could read the book, view the output of the tests, and write code:
Testing
I followed the book’s instructions to create tests and adapted them for Rust. Again, cargo-watch is a great tool to have when developing tests.
For the tests to be close in proximity to the code, the code itself is in the same file as the code implementation. This can for sure bloat the files, but it seems to be the de facto for Rust projects, and it started to grow on me at the end of the project.
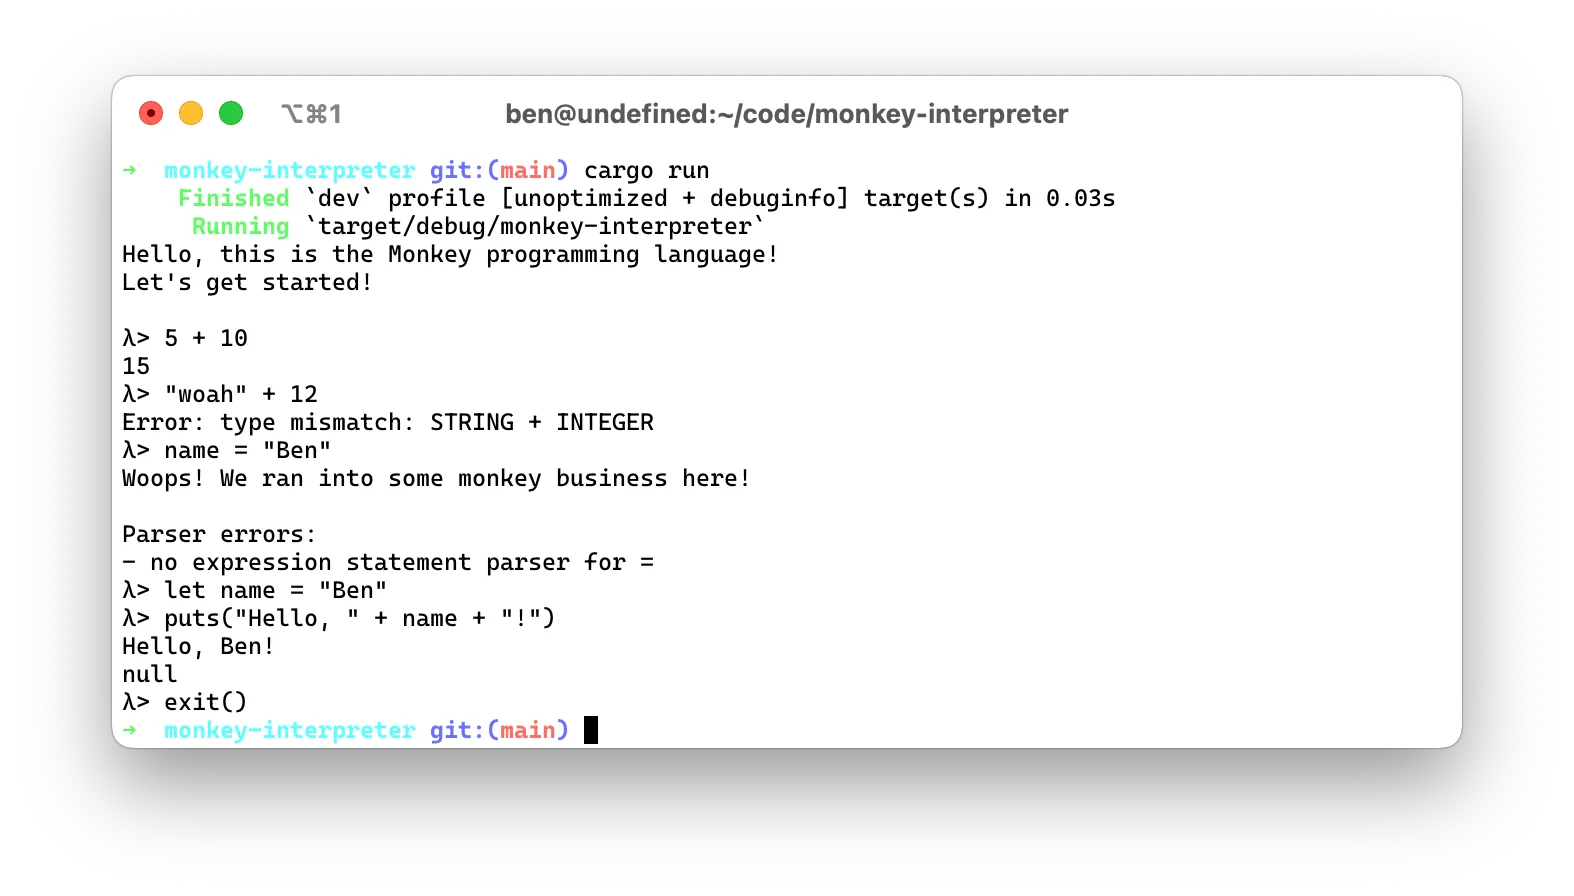
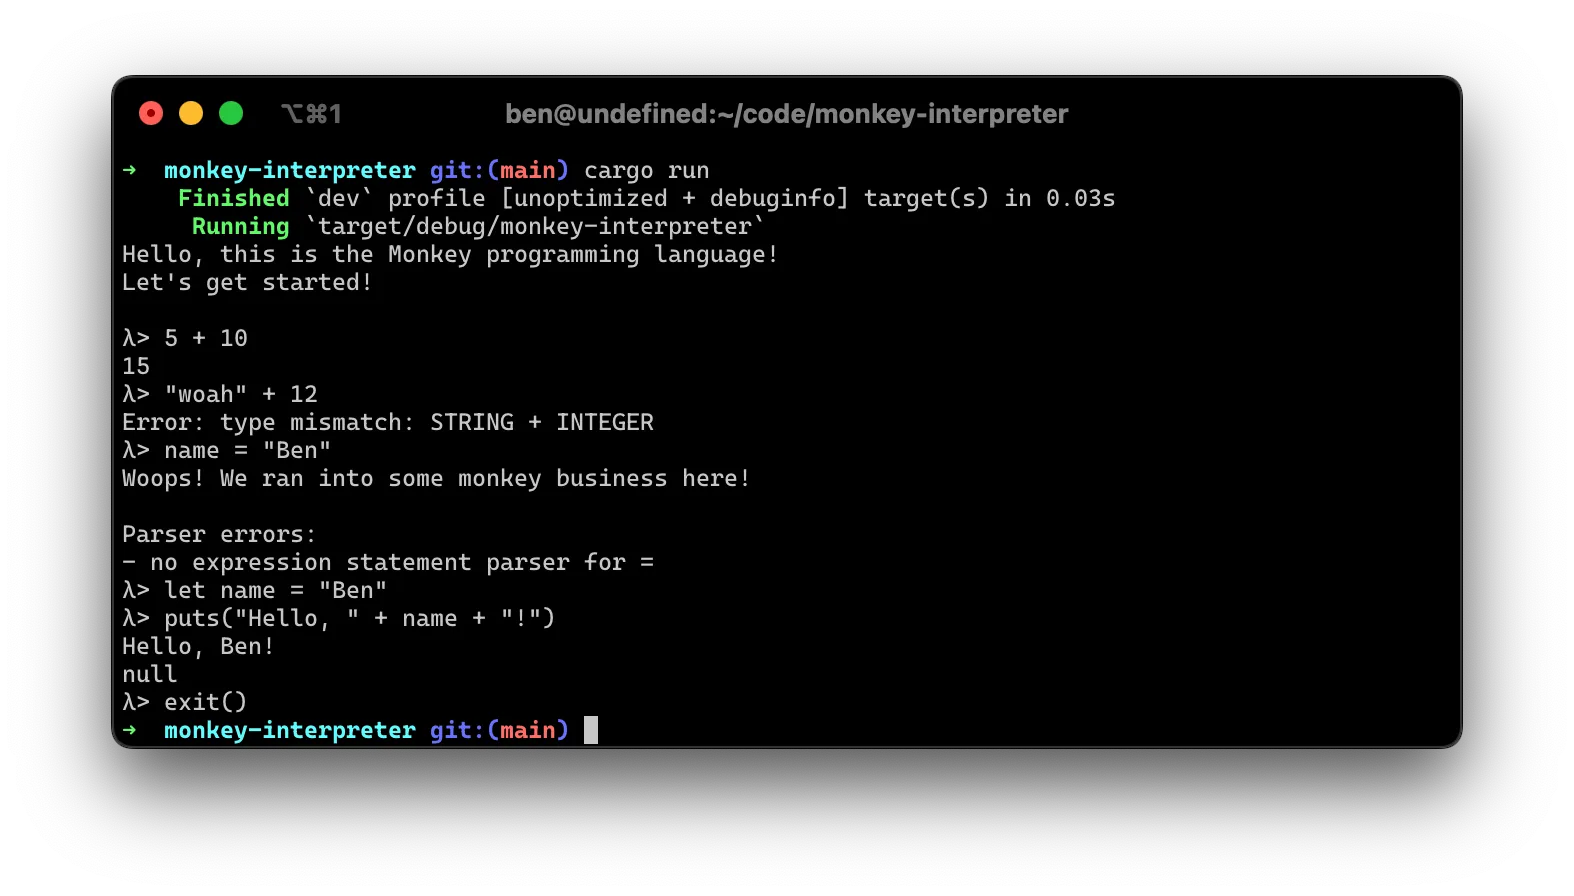
REPL CLI
To test out the interpreter, I followed the book to create a simple REPL CLI tool to execute Monkey code. It is pretty basic and doesn’t support everything that the Monkey language supports, but it is a good start.
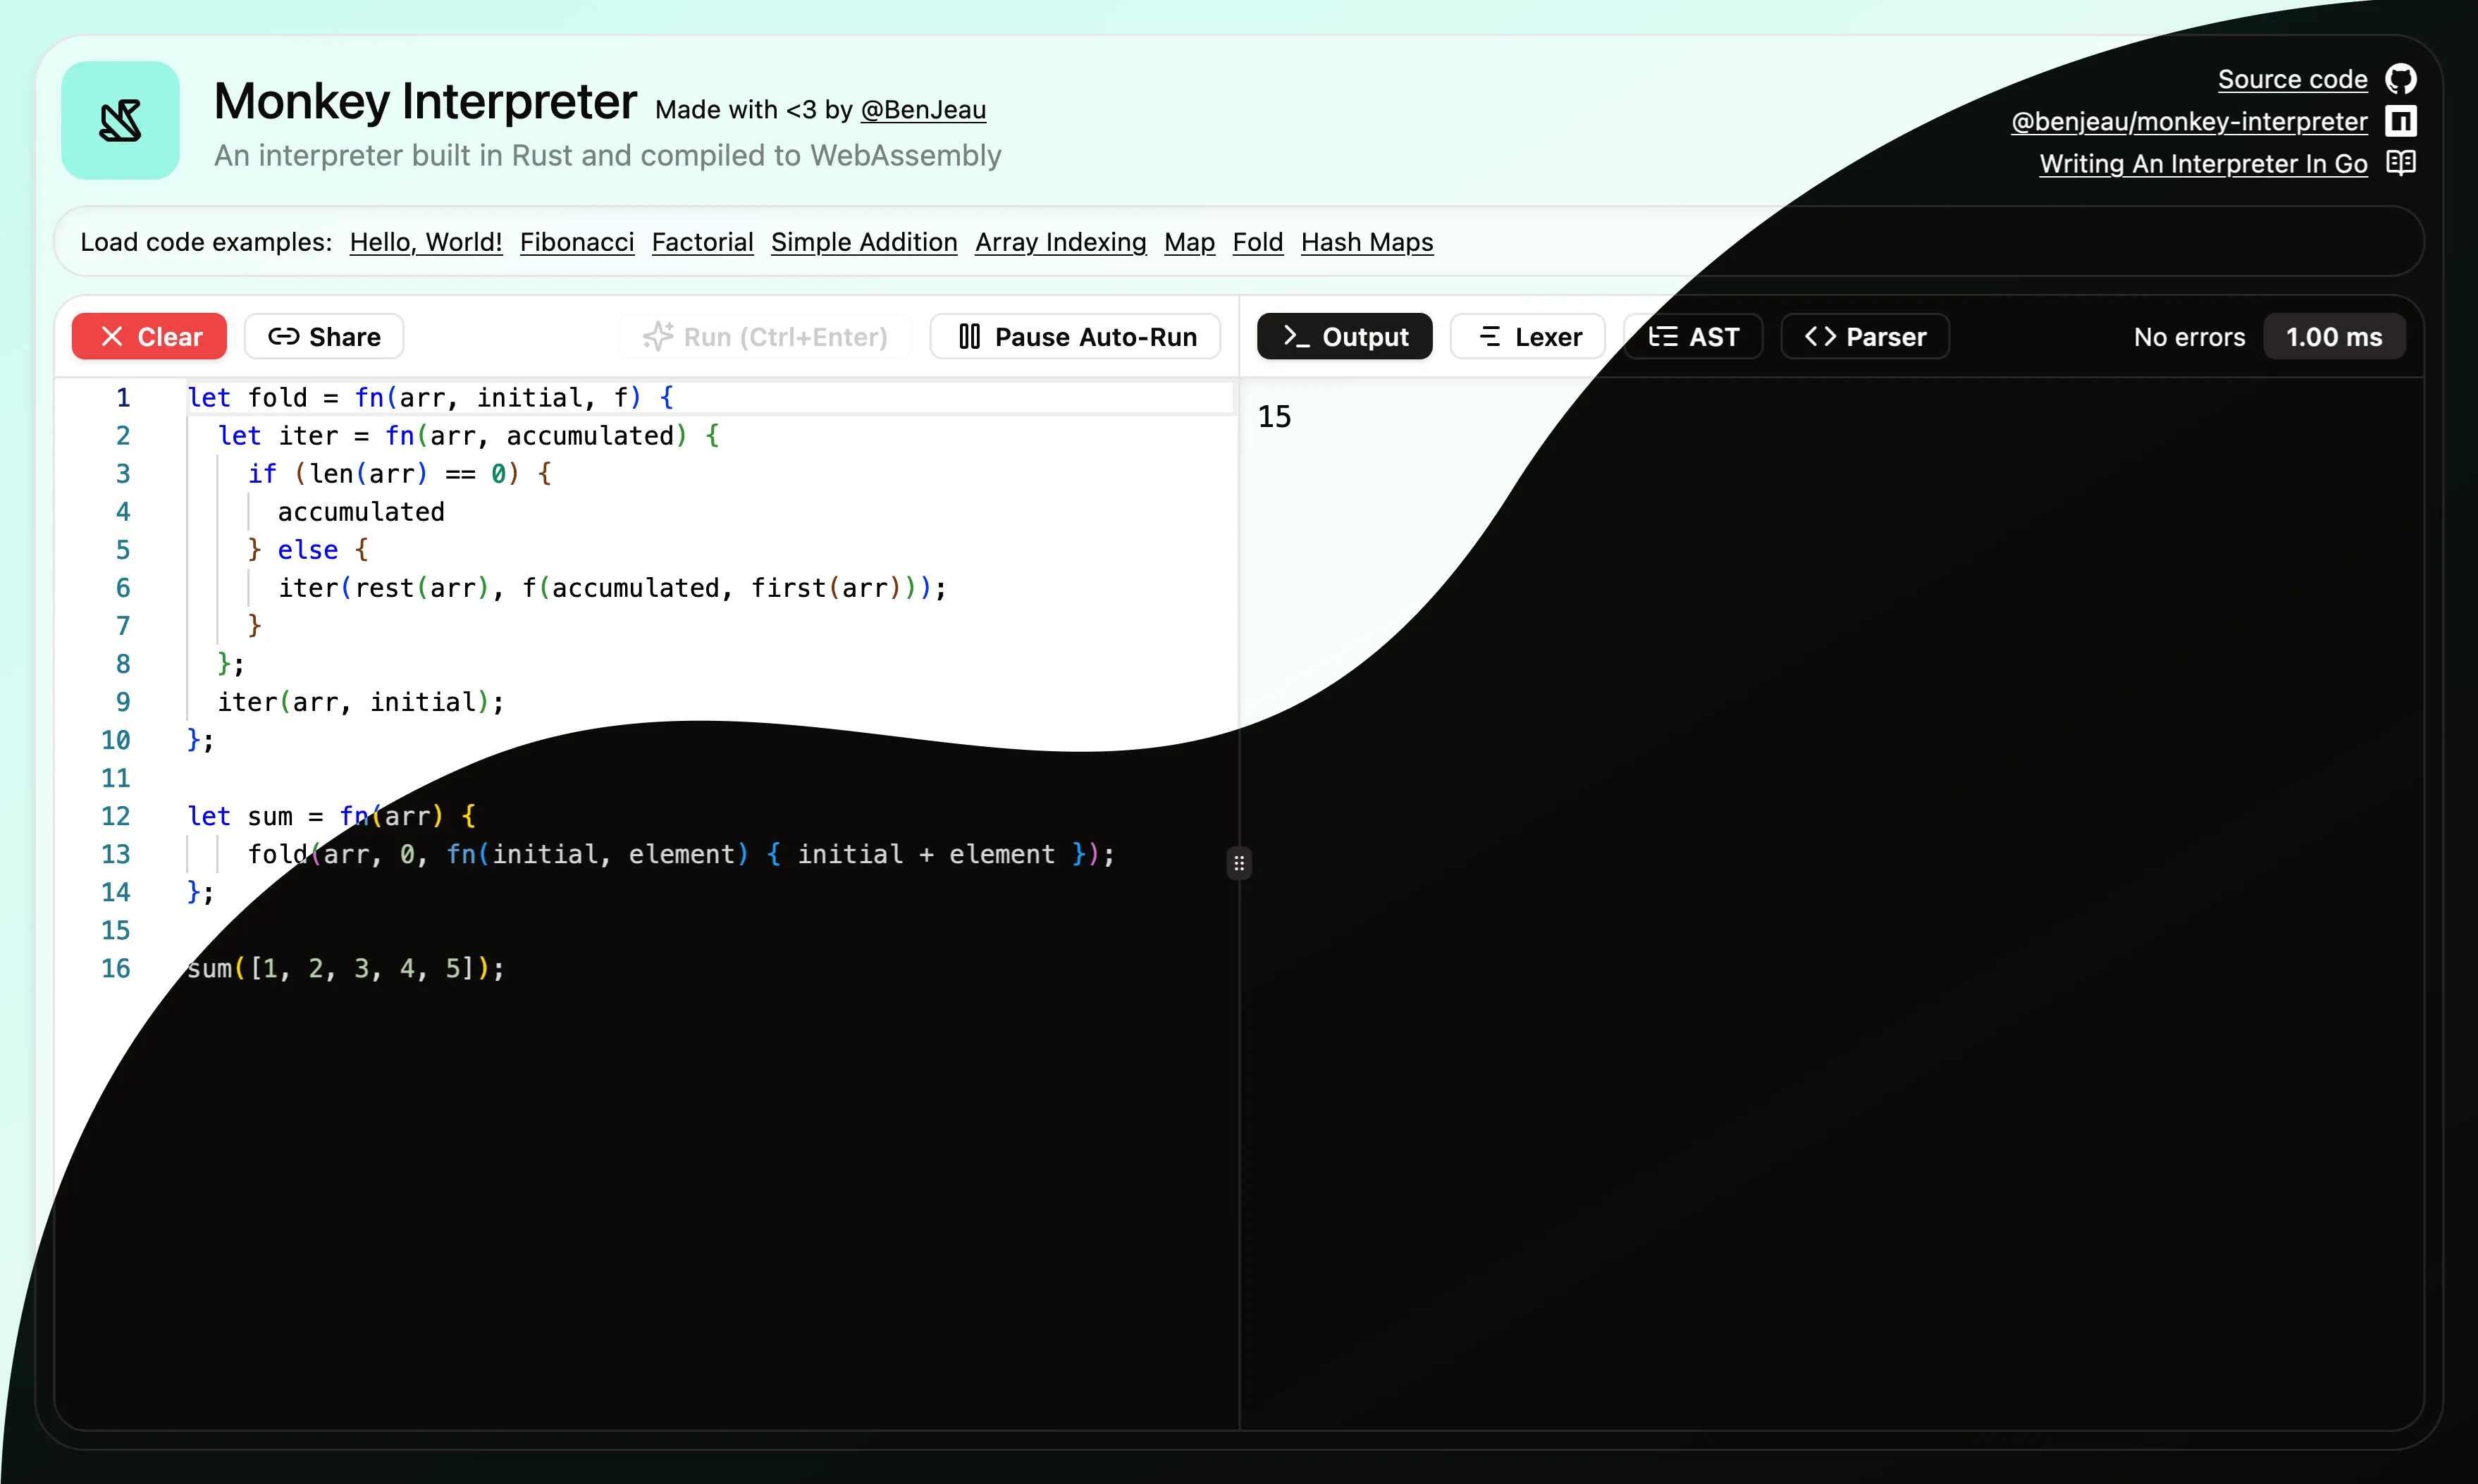
Interpreter Playground
I wanted it to be a bit more interactive, so I created a small React app that uses the compiled WASM package from Rust. It’s built with Tailwind CSS and shadcn components.
By default, it automatically runs the code you write in the playground. It allows you to view the:
- code’s output
- lexical tokens
- abstract syntax tree (AST)
- parsed Monkey language code
- errors
The playground’s editor is using Monaco Editor, which is a powerful editor built by Microsoft (basically VSCode’s editor) and I’ve used a custom syntax highlighter to highlight the Monkey language.
Lately I’ve also been embracing more and more browsers’ features to simplify frontend applications. All of the code is represented in the URL so you can share the URL with others or save it as a bookmark.
Here’s a preview of the playground that is also available on monkey-interpreter.jeaurond.dev:
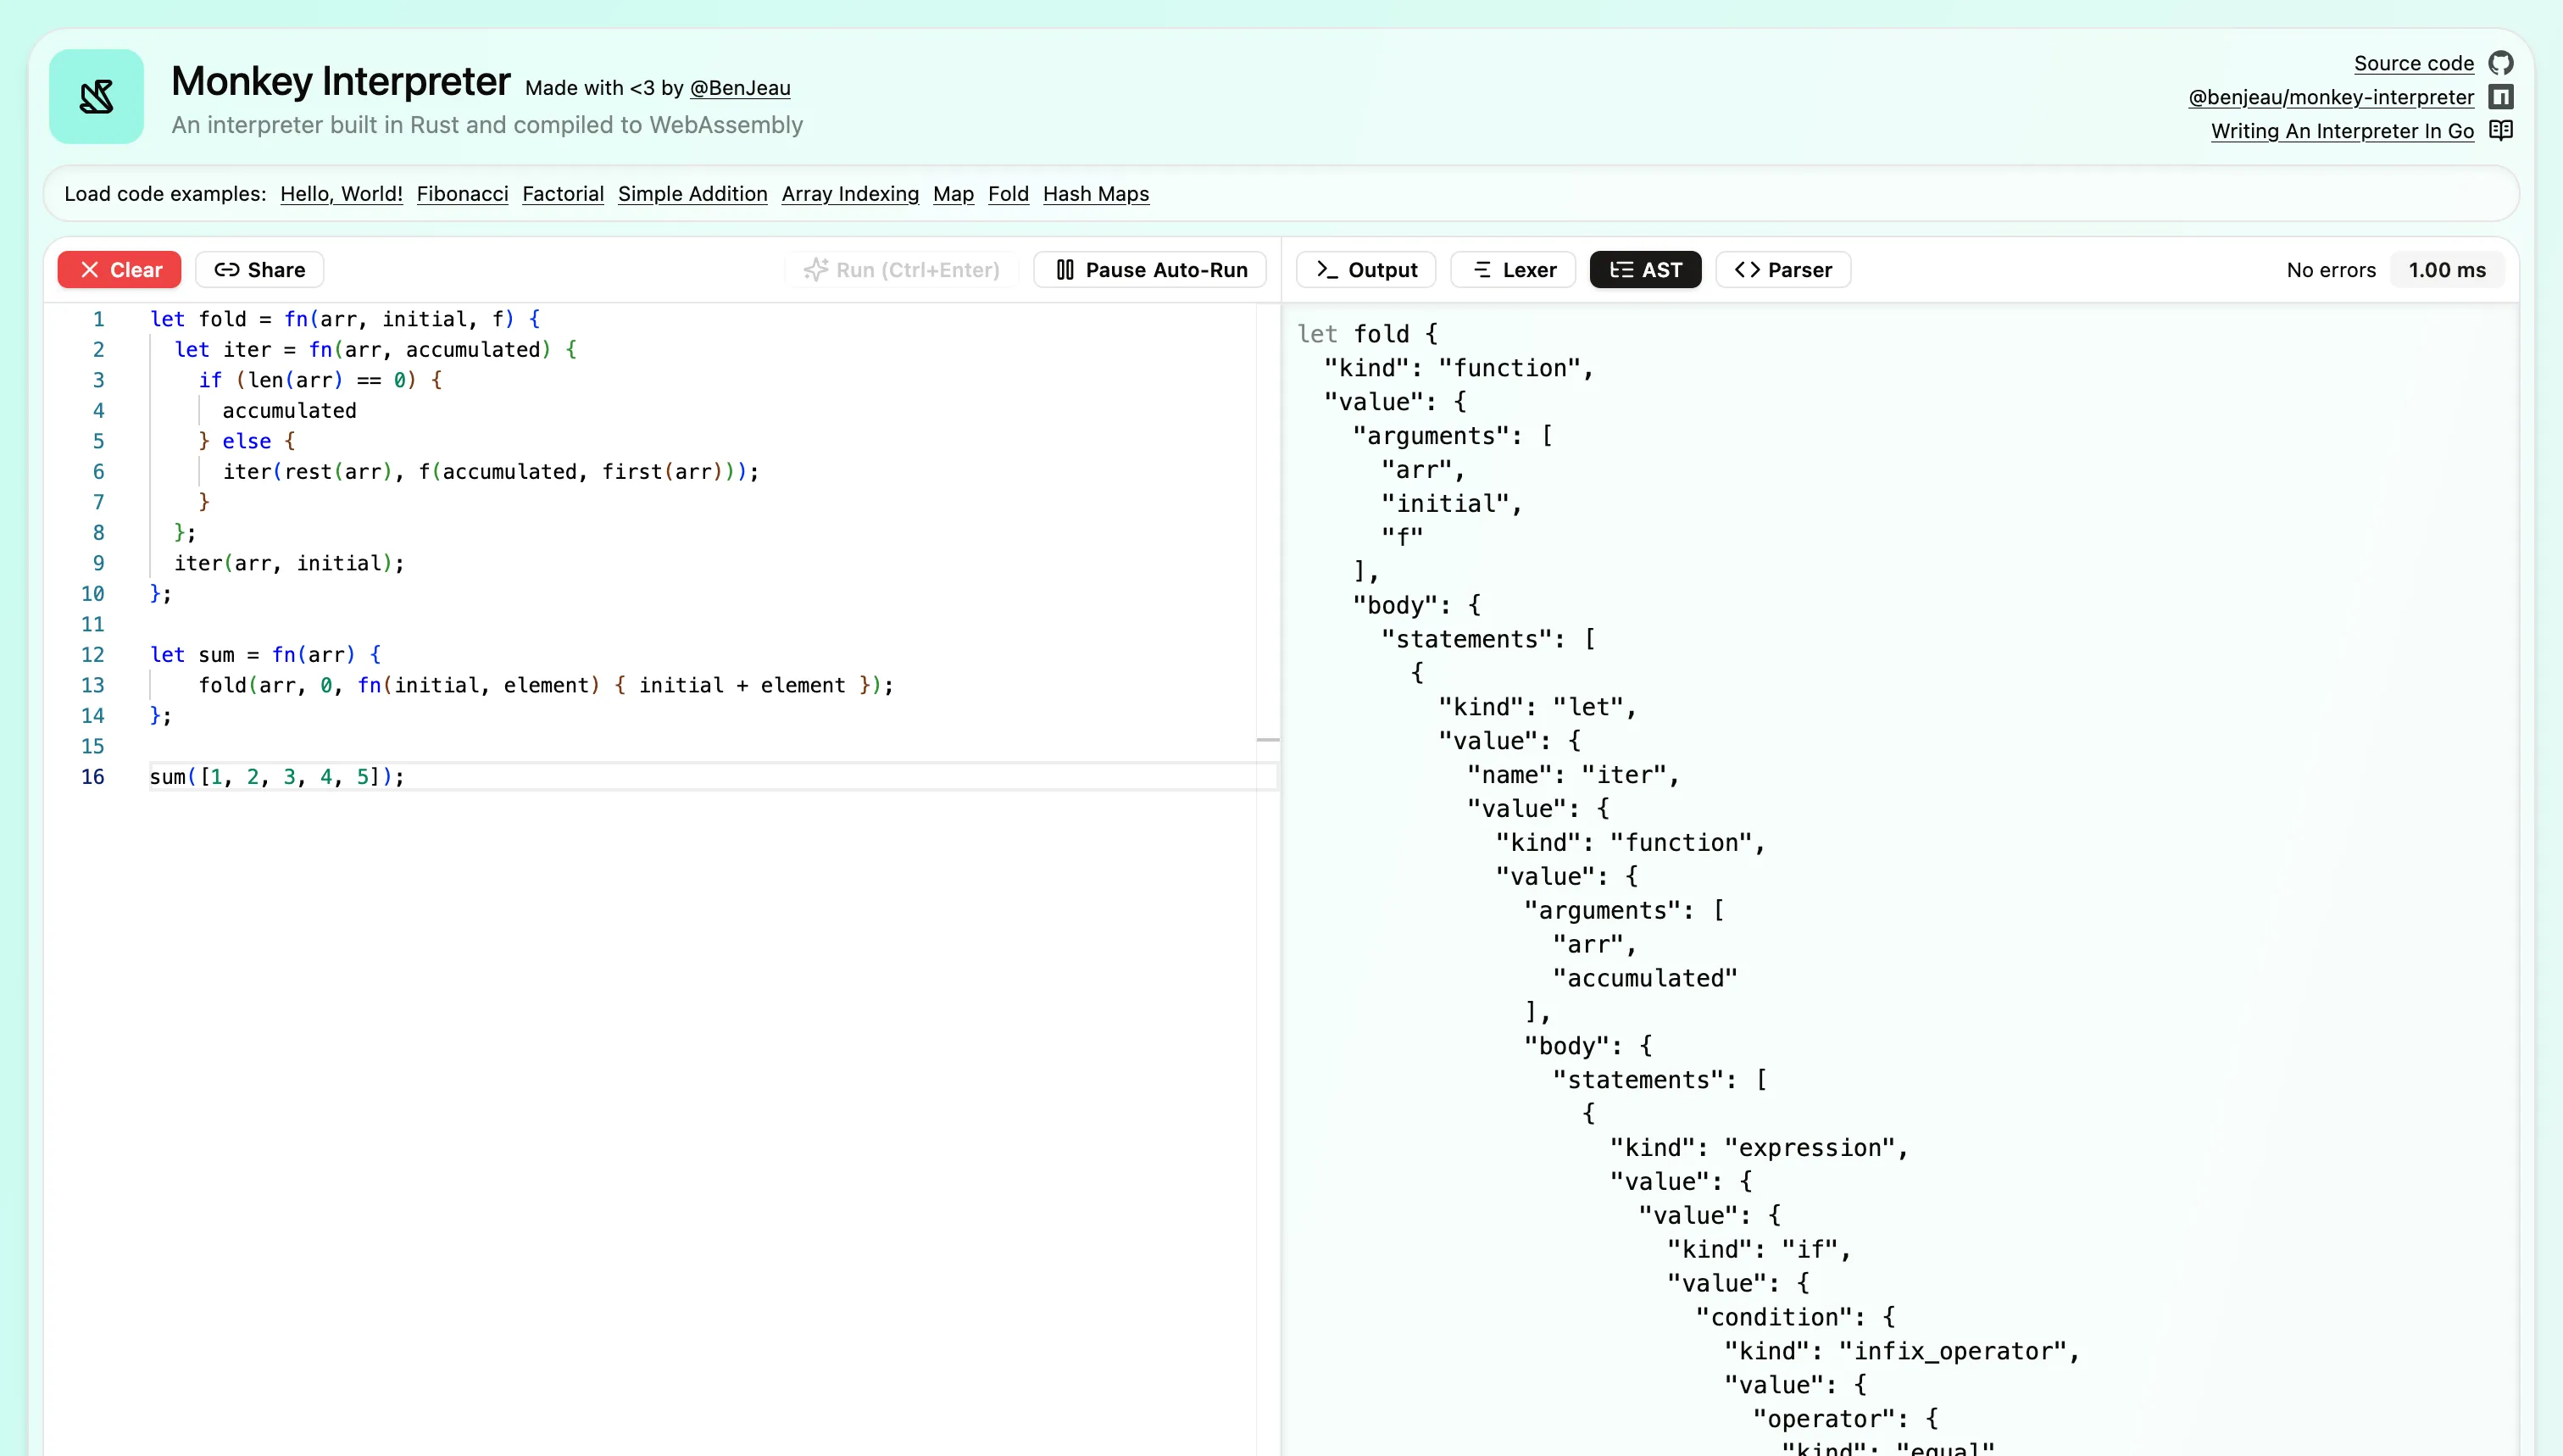
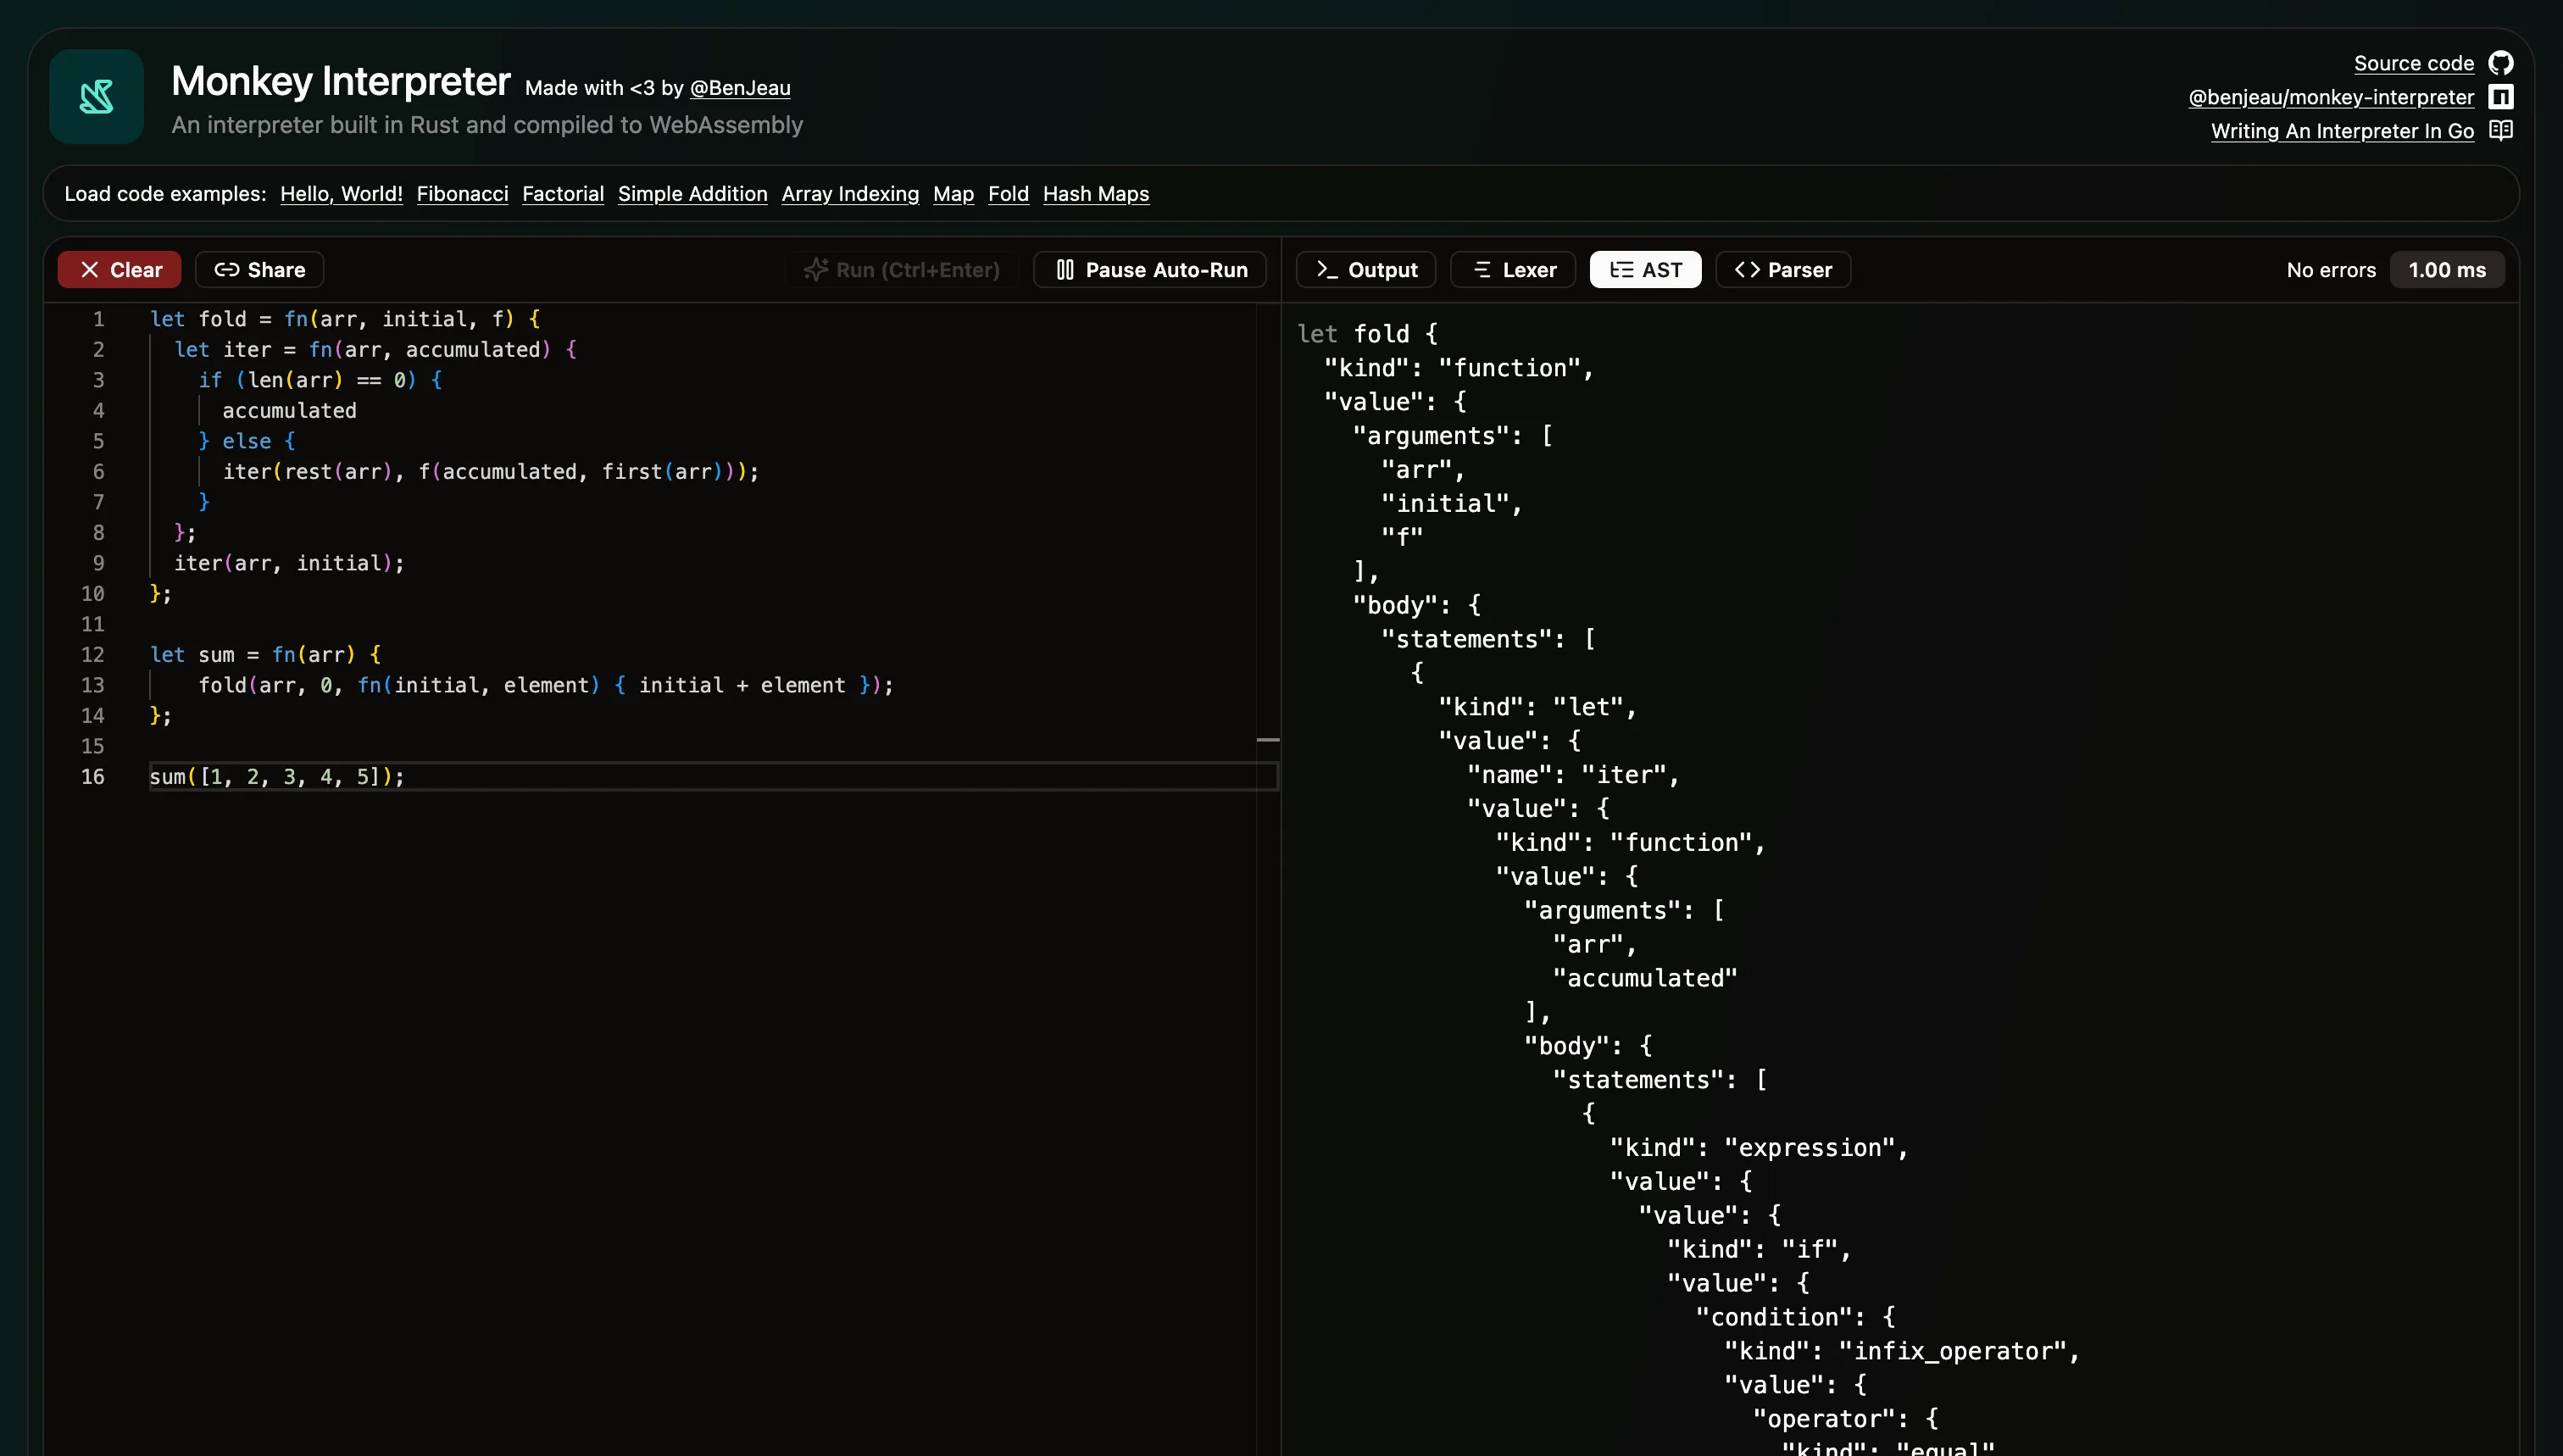
If you don’t know where to start with the Monkey language, there are a few examples at the top of the playground to get you started.
Source code
The entire source code for the interpreter and the playground is available on my Github - @BenJeau/monkey-interpreter.
Deployment
I didn’t want to manually build and create deployments for the npm package and the frontend, so most of it is automated.
npm
The frontend WASM package is published to npm at @benjeau/monkey-interpreter and is available to install within any project. This helped with the deployment of the frontend.
Github Actions
To create a new release of the npm package, there’s a single manual step to do, the one to trigger the Action workflow by specifying the type of semantic version to bump. It runs the:
- linter
- formatter
- tests
- auditing of crates/dependencies used
- build of the WASM package
Once that’s done, it updates the version of the package in the Cargo.toml file, builds the WASM package, and publishes it to npm. Not too bad for a single manual step!
Cloudflare Pages
The frontend is hosted on Cloudflare Pages with no need for a backend server. This wasn’t the first time I used it, and it’s the easiest way to host an SPA. The setup for it is not seen within Github Actions, but it builds and deploys the frontend within seconds on every push on the main branch.
Conclusion
At the end of the book, I did learn more about the implementation of an interpreter in Rust. Many of the concepts were a refresher from my university days, but it was still a fun project to work on.
I have a few main takeaways from this project:
- Creating an interpreter in Rust simplifies development. I found myself not needing to do many of the things that were shown in the book due to Rust’s strictness in types and ownership.
- Testing allowed me to refactor the code multiple times and ensured that the code was correct and working as expected. I also found it easier to test than other projects, but that could be due to the nature of the project.
- While I did not rely on any crates/dependencies, I think if I would have used something similar to a parser combinator framework like nom, the code would have been more concise and easier to understand.
- I had personally used nom for other projects, and I loved it. It does require a different way of thinking, as it combines the parser and the lexer into a single framework, but it usually results in a more concise codebase and less code overall.